SuperUser Account
/ Categories: The Basics Blog

Working with 3D Puff Embroidery - Part 3

Embroidering Puff Designs

Reminder: Choose the Right Foam

Now that you have learned the basics about 3D embroidery, let’s learn how to best embroider puff designs.

Before you start, you must first purchase foam right for your project. Foam is what gives the design its loft. We recommend that you get the foam specifically from an embroidery supply store. Do not use any craft foam as it won’t work for 3D puff embroidery. 

The most common foam height is 3mm, but depending on brands, you can also get 6mm or even high density foam which will give you a more rigid vertical edge.

Match the color of the foam with the top stitching. Foam can peek through, so the closer the match, the better the end result. Get familiar with the colors available, since they are limited.

Prepping the Project

The steps needed for embroidering a puff design fuss free are:

1. Programming the machine to stop between colors

2. Securing the foam

3. Cleaning up in post production

Programming your colors and color stops 

Load your design onto the machine. Select the design and program the thread colors. If you have ever done an applique or patch attachment, you are probably familiar with how to make your machine stop between colors. If not, then check your manual on how to do this. 

You want all of the flat areas to run, then stop before it gets to the embroidering of the top stitching. On your machine, program the color stop between the flat color segments and the puff area.


Step 1: Find and upload your design Step 2: Program your colors Step 3: Program your color stops
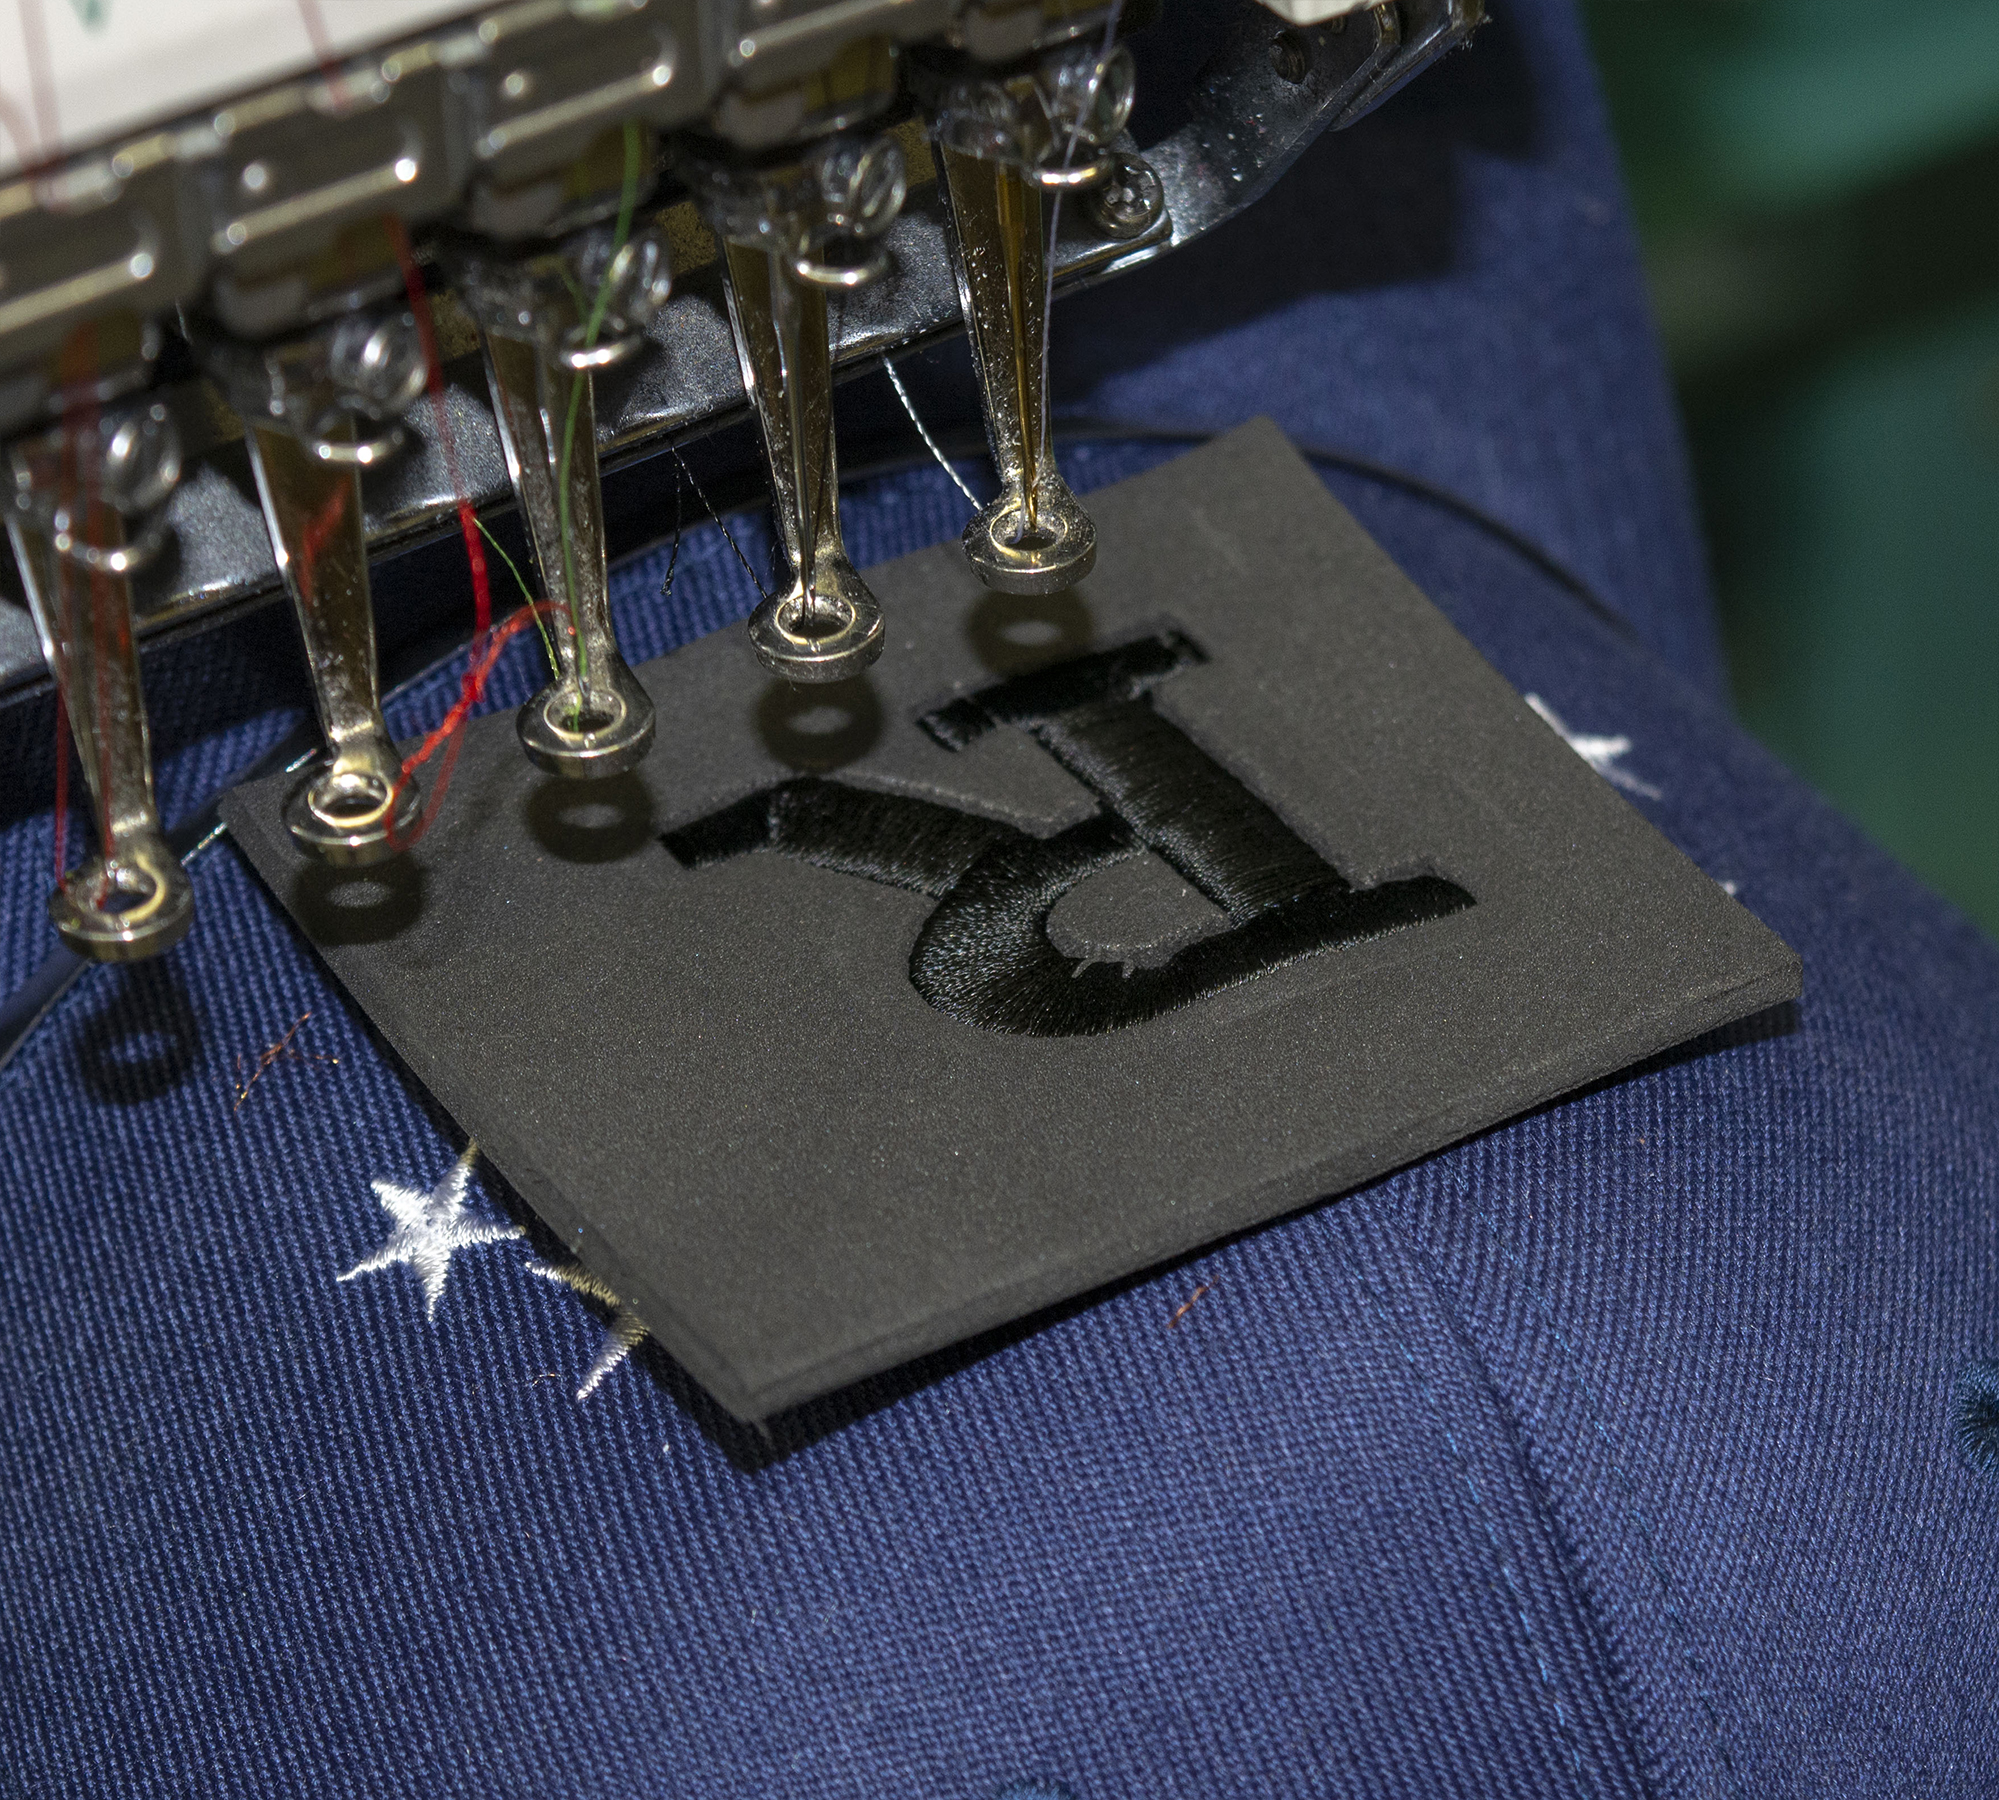
Find and select your design to upload Program your colors Program your color stops


Securing the foam

So you have the programming done, now what? Just hoop your garment, put it on the machine and press go. When the machine stops, place down your foam. Secure it as much as possible, I like to start with a quick burst of spray glue on the back of the foam and tape on the corners if room is available. 

On hats specifically, I recommend a Broccoli Bunch rubber band going around the hat securing the bottom of the foam. If the foam bounces around too much, it could result in a loose looping effect on the top stitching.


The machine will stop after all the flat areas are finished. Place foam down and restart the machine. When design is finished, pull out your hat to start post production.
The machine will stop after all the flat areas are finished Place the foam down and restart the machine


The Finishing in Post Production

When the design is finished, unhoop the product and begin the post production process. 

1. Pull any excess foam from the product. 

2. Apply a heat gun to the cap in a quick circular motion (be careful, concentrating on one area can result in melted thread or even a charred hat.) This will help shrink some of the foam bits that may be showing. 

3. Use a sharp implement, such as a needle or the point of your thread clippers, to push the foam back behind the top stitching if there are any pieces of foam still peeking out. 


Peel off the foam. Carefully apply heat to the foam to shrink away the parts of foam that may peek out. Push any remaining foam bits back in with a sharp implement.
Peel off the foam. Apply heat to the foam. Push any foam back.


So that’s it. Simple as 1-2-3.

1. Program the design with a color stop

2. Place the foam down when the flat area is finished

3. Clean up in post production


Watch for our next installment in this 3D Puff series, when we go through the rules of puff.

 Author: Jesse Elliott

Over 30 years of experience in digitizing embroidery and screen printing


Previous Article Gaining Visibility into Satisfaction Rates
Next Article Working with 3D Puff Embroidery - Part 4
Print
11123 Rate this article:
2.0

6 comments on article "Working with 3D Puff Embroidery - Part 3"

Avatar image

Speedypaper

https://globalhack.org/speedypaper-com/


Avatar image

Geometry Dash Scratch

I can enjoy it and try my best to win. I hope that you can participate in the game with me. It will become the best game of you.

Leave a comment

This form collects your name, email, IP address and content so that we can keep track of the comments placed on the website. For more info check our Privacy Policy and Terms Of Use where you will get more info on where, how and why we store your data.
Add comment

Theme picker

What is the difference between a JPG, PNG and GIF?

What is the difference between a JPG, PNG and GIF?

JPEG also shortened to JPG is a file type developed by the Joint Photographic Experts Group(JPEG) to be the standard for professional photographers. Just like ZIP files are used to compress data, JPGs compress images by reducing sections to blocks...

Continue Reading →

What can vector art do?

What can vector art do?

Vector Artwork does not rely on pixels per inch like a Bitmap. A bitmap and other standard file types such as jpeg, gif and png use pixels(or colored squares) to render complex images at the expense of being able to...

Continue Reading →

What do we mean by Bitmap?

What do we mean by Bitmap?

Bitmap graphics are the most common image format. File formats like JPG, GIF, PNG, TIF and Photoshop PSD, are all bitmap images. They are all made of small points of light called pixels(Fig 1). You may also hear these files called...

Continue Reading →

Vectoring Art and Drawings

Vectoring Art and Drawings

Just like vectoring photographs, vectoring art, or drawings can present a particular set of challenges, from color blends, to textures, to unique materials and hand drawn looks. One of the first obstacles in recreating any piece of artwork is not...


Continue Reading→

Tackle Twill – Go Big!(with less stitches)

Tackle Twill – Go Big!(with less stitches)

Tackle Twill can be a great addition to any embroidery shops playbook. These designs will allow you to produce large filled areas that would normally take tens of thousands of stitches to accomplish with just a few zig-zag stitches around...


Continue Reading →

The Right Software For The Job

The Right Software For The Job

Whether you're doing the work yourself or contracting with a vendor, it's always a good idea to be familiar with and have a copy of editing software. If the need arises it will allow you to make quick and easy...

Continue Reading →

Small Lettering Guide – Part 1

Small Lettering Guide – Part 1

Twill/Denim/Nylon With fabrics such as twill, denim, or nylon, embroidery does not sink much and generally floats on top of the fabric. This creates less of a need for underlay and shorter pull compensation, thus allowing us to go smaller...

Continue Reading →

Small Lettering Guide – Part 2

Small Lettering Guide – Part 2

Short and Wide or Sharp Corners Wide fonts (also known as extended) and fonts with sharp corners are much more difficult to come out nice in embroidery. On corners, both the horizontal and the vertical strokes have more chance of...

Continue Reading →

RSS
12345