Corners and Capping
Digitizing can be more complex than you think. Something that may seem simple can actually be really difficult to get right. This is true about digitizing corners.
What’s so difficult about corners in outlines? You just make a line, transform to a satin stitch and you are good to go, right? Well, sort of. This article will be focusing on how and when to adjust corners in a design. I use Wilcom, but you can do the same things in Pulse and Design Shop, just the language might be slightly different.
The Basics
Let’s first go into how the spacing in satin stitches is produced. For a simple straight line, spacing is going to be evenly distributed from point A to point B(Fig 1).
 Fig 1 – Straight line stitching
When you add a corner, things change. The spacing is predicated by the angle. So when you start with a line that is straight, then goes into a corner, the angle of that corner determines the spacing. What this means, is the spacing will be wider at the corners than at the straight end. They will also be wider the further out you go. So the thicker the line, the wider spacing for the outer edge of the stitch(Fig 2).
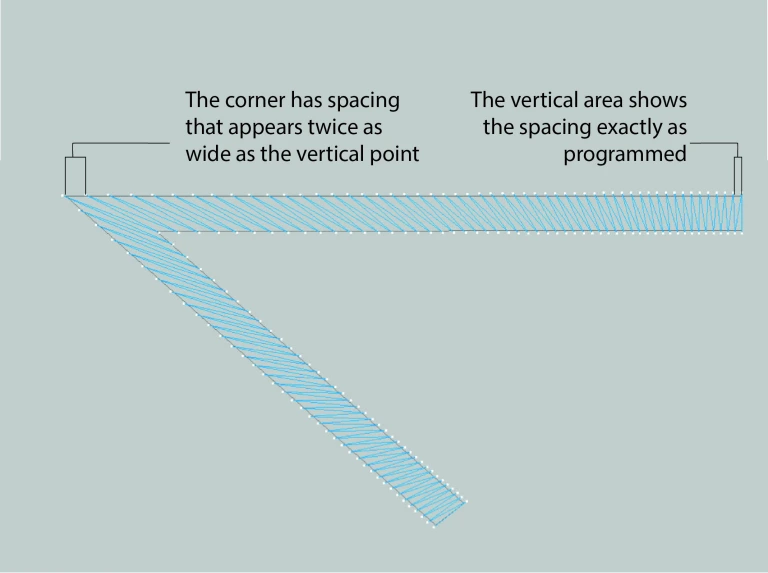 Fig 2
Fig 2
The other thing that happens, is how pull compensation is affected. Pull compensation goes directly out from the stitch, so if you have a stitch that is vertical, then the pull compensation will go directly up. Now at the same corner, the pull compensation will follow the angle so it will actually appear shorter than the straight up and down part. The more compensation is needed, the more this will be noticeable.
When using input C (also known as Steil stitch in Pulse) you have an option of Fractional Spacing which helps determine the point the stitch direction changes from perpendicular to following the angle of the corner.
On a hand created border such as input A in Wilcom and Column Tool in Pulse, a border is made by creating the inside and outside edges. If you just go from corner to corner, you will get a gradual angle of stitch direction along with the spacing appearing wider.
For thin borders (approximately 1.5 mm wide and smaller), that are more obtuse such as an octagon, simply going from corner to corner will do. A better option is to go from corner to corner and add direction lines going perpendicular somewhere near the corners. This will help keep the border from looking bowed in the middle and reduce the amount of area that will have wider spacing between stitches. Acute angles such as the points of stars would require this technique(Fig 3).
 Fig 3
Fig 3
Mitre and Caps
Now we will explore mitre, hand mitred, and caps. A mitre corner consists of a stitch that tapers into and out of the corner with an overlap where the two lines meet (think a picture frame.) To mitre a corner, go into object properties>FX>/smart corners and select mitre corners. You can tell it at what sharpness of an angle you want it to activate. You can also have control of how much overlap you use. Sweats and knits will need more overlap than nylon or twill(Fig 4).
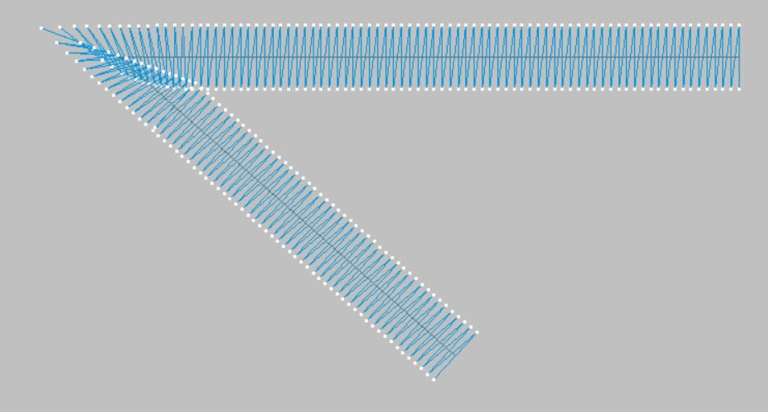 Fig 4
Fig 4
 Fig 5
Fig 5
One important thing to keep in mind about mitred corners is that auto underlay does not adjust for the tapering. So you could end up with twice as much underlay in the corners then you need. This is more of a concern when going from extra wide widths, where the line will need more underlay. In this case, I suggest making a hand version and breaking up the corners so you can change the underlay in just those areas. In the hand version, instead of angling towards the corner, keep the stitch perpendicular and end just a stitch or two away from the corner. It may look wrong on screen, but will fill up the corner when sewn.
Capping consists of two conjoining lines meeting as one solid section at the outer corner. The change from two lines to one point can sometimes look jarring, so adjust the split stitch function to activate for a little bit of the width to provide a smoother transition (Fig 6.) Capping is perfect for doing small capital A’s.
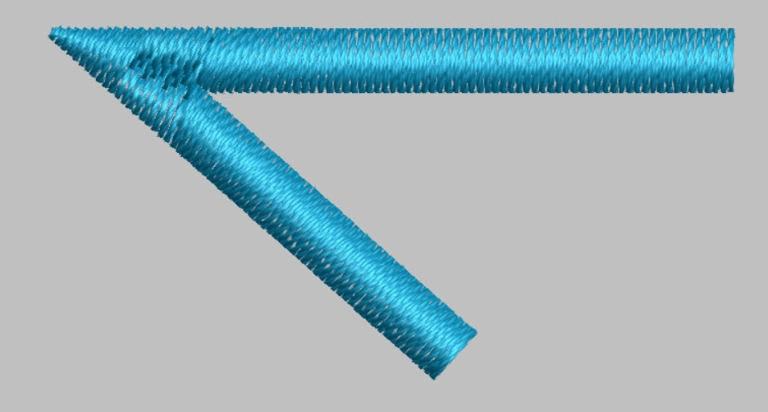 Fig 6
Fig 6
Try comparing what it looks like when you hand do capping and when you use the auto cap corners function. You have more control when you hand digitize the capping (Fig 7), so try them both out and experiment with the controls.
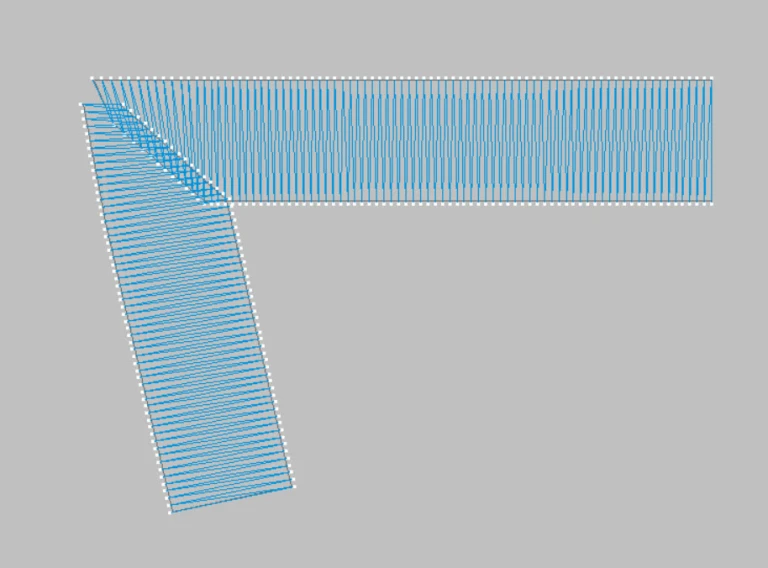 Fig 7
Fig 7
Fig 8. illustrates how much the angles really influence the shape and density of the line. On the left is normal pull compensation, but on the right, we have increased that pull compensation greatly to give you a closer look at how the lines are affected. Look closely at Angled Corner, Corner Fraction On and Mitre Corner. All of these show how the angle controls the final look of the lines.
 Fig 8 – Angles and pull comp
The best advice I can give you, is to try all of these methods and determine what works best for you. Factors such as different stroke widths and fabric types may require different corner styles.