Working with 3D Puff Embroidery - Part 2
SuperUser Account
/ Categories: The Basics Blog

Working with 3D Puff Embroidery - Part 2

Digitizing - Next steps when working with 3D Puff designs

Digitizing for 3D Puff Embroidery

Adding 3D puff embroidery to your design is a great way to make your logo stand out, but how is it digitized?

Foam is added to the design to create loft. Because of this, we need to digitize specifically for the foam areas. The 3D part is always last, so if you have flat areas in your design, you will need to do those first.

While this can vary, there are usually these steps:

  1. Flat embroidery
  2. Placement line for foam
  3. Puff area

In the picture below, the top color stop (outline) is flat embroidery.  The second stop is the placement line which will help the operator determine where to place the foam.  The third color stop is the 3D part of the design.
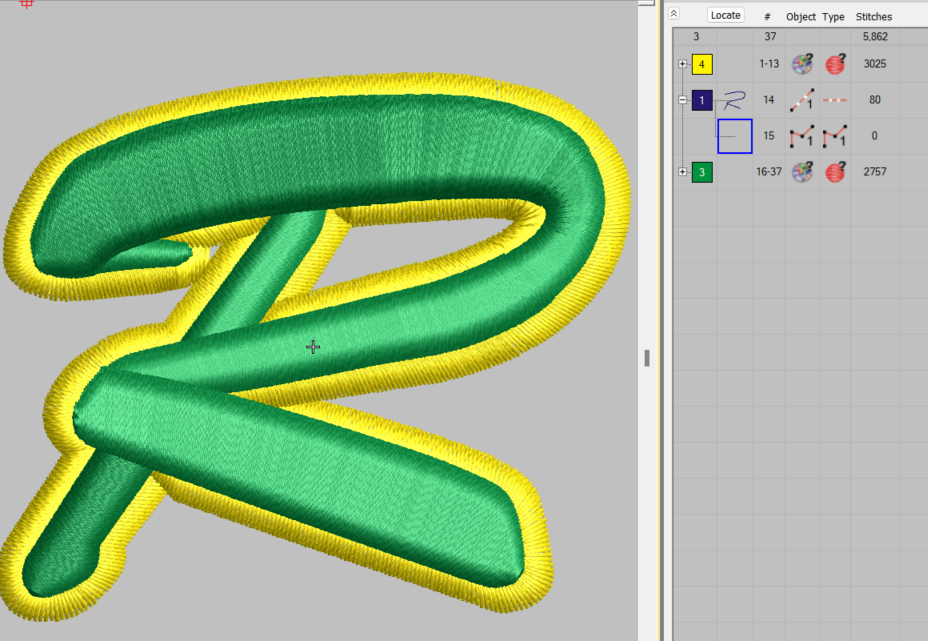
Run Order for Digitizing


Perforating the foam

Perforation around the perimeter


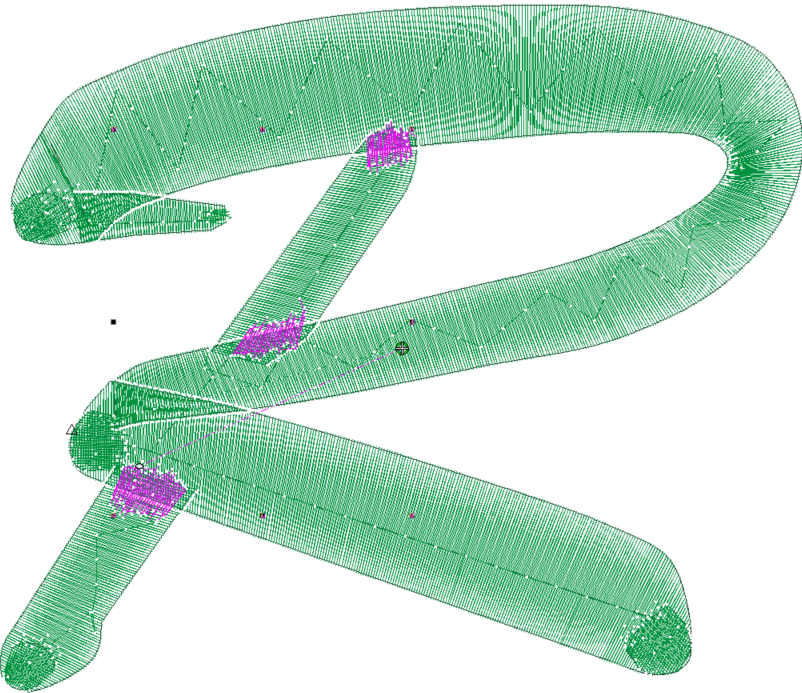
The foam needs to be perforated, similar to a postage stamp, to the shape desired. This is done by using a satin stitch that is twice as dense as regular flat embroidery. The needle points are what cuts the foam. The entire perimeter of the shape needs to be cut. Since satin stitches have open ends in the columns, you will need to create a cap. The outer edge of the satin stitch cap will help perforate the foam.

Like a stamp, the foam will need to be perforated around the perimeter of the puff area.


Top stitching

Top stitching will go over the caps. The final satin stitches will cover up the caps and other underlay. Making the stitches more dense is not all. We need to do something about the open areas (circled) or foam will be exposed as shown below.
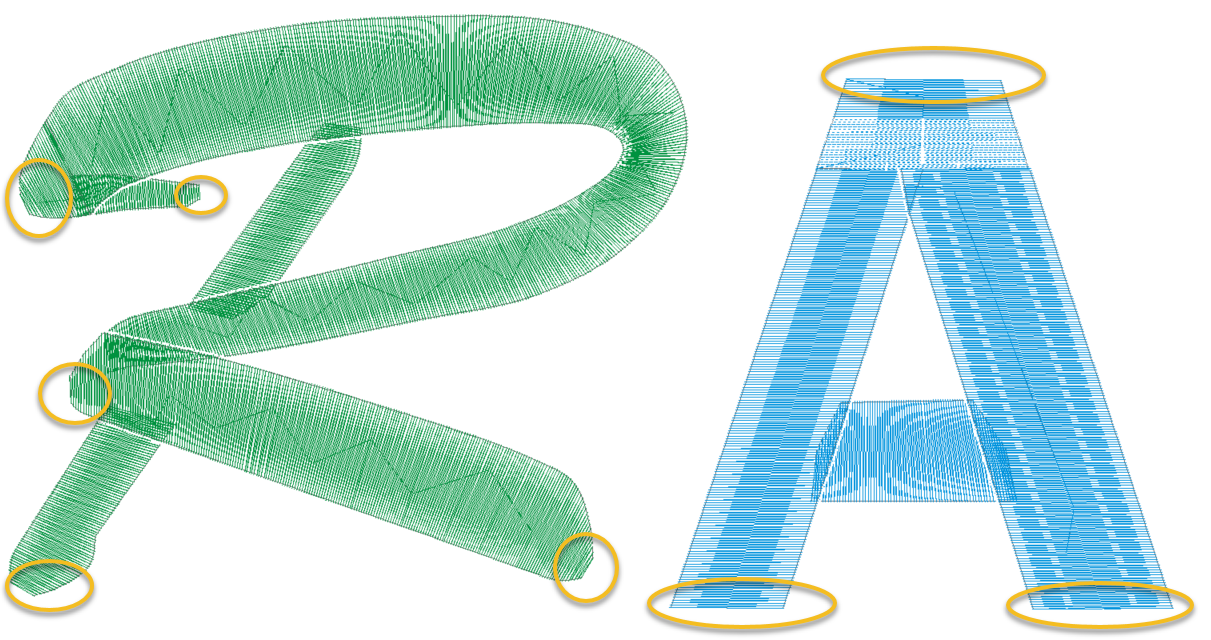


Shown here, in the following image, are the caps, which will help cut the foam on the otherwise exposed areas, these are done before the top stitching and will not show.
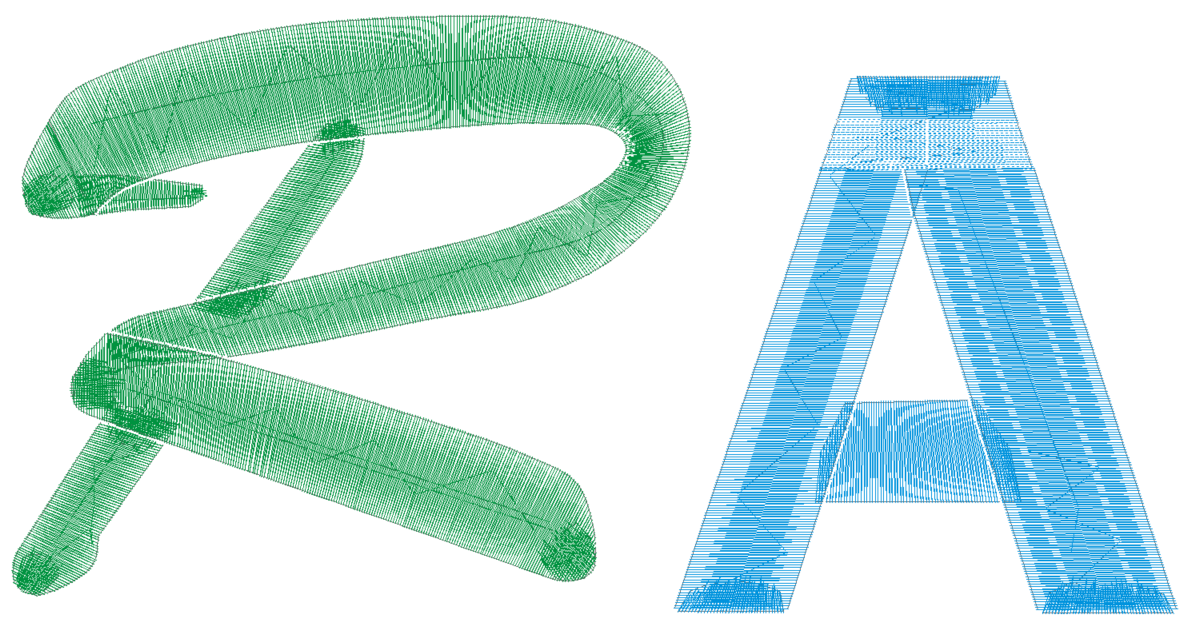


On the left below, the hilted parts are known as “caps”. They help perforate the ends of the design that might otherwise let the foam peek through.  On the right, a design might have certain stress points that will also need stitches. Wherever there is a chance of stitches pulling apart, this underlay will prevent the foam from showing through.
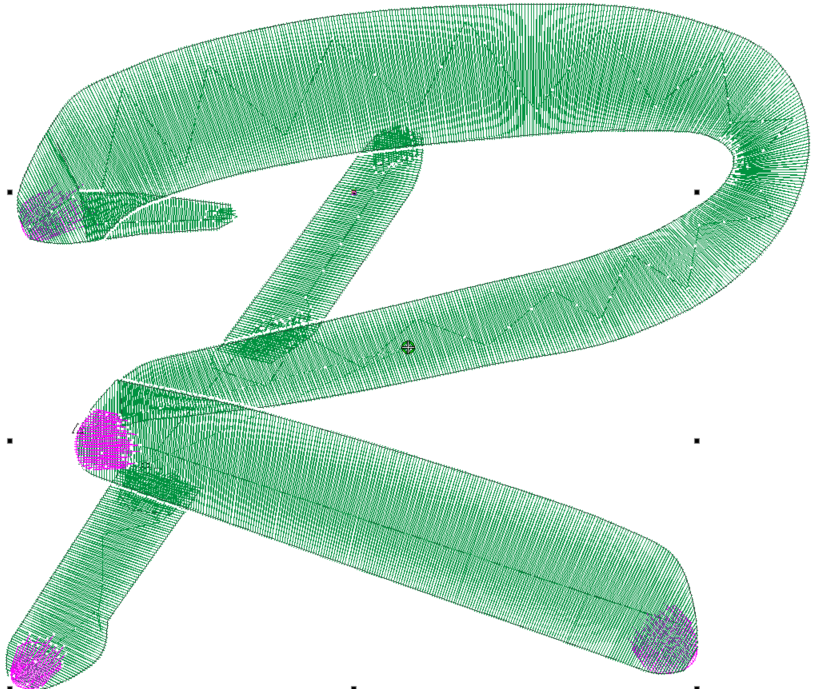
Hilted capsStress points

Watch for our next installment in this 3D Puff series, when we go through the process of embroidering the puff design.


Author: Jesse Elliott

Over 30 years of experience in digitizing embroidery and screen printing

Previous Article Some of the Ignition Team
Next Article We offer Exact Sew Outs!
Print
13184 Rate this article:
No rating

11 comments on article "Working with 3D Puff Embroidery - Part 2"

Avatar image

Bob

I am in the process of buying a tajima tmark machine and plan on using it primarily for Raised logos on Ball caps.

Any info you can provide to make the process go smoothly will be greatly appreciated. The machine will be in the end of the month and I have 500 pieces to do.


Avatar image

pizza tower

I appreciate the patience if you do it, to complete it takes a long time meticulously.


Avatar image

MichaelWilson1

You can find out more here than on other websites. Honest reviews will give you a solid understanding of which writing services you can trust.


Avatar image

sd

sdsd


Avatar image

John Edwart

I've read your article. Honestly, I've never read this type of informative and efficient article before. This article will help lots of beginners like me to build skills in embroidery. Love to read your incoming blogs too. Really appreciate your work and dedication.

We have https://crystaldigitizing.com/usa-digitizers-embroidery/ to fulfill your embroidery needs.


Avatar image

smash karts

I wish I could create the best stitching. However, I'm just a newbie. I do not have enough experience. Your article offered many beneficial things.


Avatar image

1Dollar Digitizing

Very helpful blog for the people who have interest in 3d puff embroidery step by step each step of 3D puff embroidery is explained outstandingly. I am running embroidery digitizing company, for further details please visit https://www.1dollardigitizing.com/


Avatar image

Drift Hunters

I love how the Drift Hunters game creates an exciting and exhilarating drift racing experience!


Leave a comment

This form collects your name, email, IP address and content so that we can keep track of the comments placed on the website. For more info check our Privacy Policy and Terms Of Use where you will get more info on where, how and why we store your data.
Add comment

Theme picker

Working with 3D Puff Embroidery - Part 4

Working with 3D Puff Embroidery - Part 4

In this last installment, Jesse Elliott, our digitizing expert takes you through steps to remember when working with 3D puff designs.

Working with 3D Puff Embroidery - Part 3

Working with 3D Puff Embroidery - Part 3

In this third installment, Jesse Elliot, our digitizing expert takes you through the steps of embroidering a 3D puff design.

Gaining Visibility into Satisfaction Rates

Gaining Visibility into Satisfaction Rates

"Rate Your Project" is a feature on your Ignition Drawing Dashboard: Simply click to report your satifsfaction level. 


We offer Exact Sew Outs!

We offer Exact Sew Outs!

We wanted to give you more options to streamline your customer approval process. A lot of our customers resew our orders for customer approval which adds extra days and labor to the approval process. Where? - On the 3rd page...

Continue Reading →

Working with 3D Puff Embroidery - Part 2

Working with 3D Puff Embroidery - Part 2

Jesse Elliot, our digitizing expert, shares his insights in this second installment on how to digitize 3D puff embroidery.

RSS
12345